Getting Started
This tutorial assumes you have already installed the mod or modpack. If you’d like instructions on how to install our Official Modpack, you can find instructions for doing that on Java (Forge) here, on GDLauncher here, and on the Curseforge Launcher here.
Quick Walkthrough
Before you get started on your new colony, you should find your perfect location. You need a large enough area for a full city-at least 8×8 chunks, and decently flat.
You should also gather as many resources as you can-wood, as well as cobble, coal, iron, flowers, string, leather, wool, saplings, and food.
Step 1: Supply Camp/Supply Ship
Once you have chosen a location for your colony, you must place a Supply Ship or Supply Camp. You can only place one of these per world. The Supply Camp/Ship gives you the Town Hall block you need to officially start your colony. They also have some other supplies you may need during the building of your colony. Once you have the Town Hall block and the build tool, the remaining camp/ship is just decoration. You can leave it or tear it down.
Step 2: Town Hall
The Town Hall block is what actually creates the colony. It also functions as the center of it. This is where you start using the build tool to place buildings. Using the build tool ensures you can see exactly where the building will be, which direction it will face, and if it is at the right Y level (some buildings need to be raised to the correct Y level).
Once the Town Hall block is placed, you will start receiving your initial 4 citizens.
Step 3: Builder
Before anything can be built, you need a Builder. The Builder must build their own Builder’s Hut before building any other huts, and they cannot build or upgrade a hut to a higher level than their own hut level.
Step 4: Tavern
Your colonists will need a place to sleep and a house, so it is recommended to build a Tavern next. The Tavern also allows visitors to come to your colony, and you can recruit them to stay as citizens.
Step 5: Food
The next major thing you need for your colony is food. The fastest way to get food is to build a Fisher’s Hut. You could build a Farm or one of the animal herders, but a Fisher is faster. Building a Restaurant may also be advisable if you don’t want to feed your colonists (or cook their food) by hand.
Step 6: Forester
If your style is wood, it’s recommended to build a Forester’s Hut next. That way your new Forester can start gathering wood for your next builds and for tools and other items.
Step 7: Miner
Stone and ores are another major need for any colony, so a Mine is the next logical step.
Step 8: Warehouse and courier
At this point, you might be tired of bringing all of the resources to the Builder and taking them from the Fisher, Forester, Miner, etc. You also might want to store items in one place. Well, the Warehouse and Courier’s Hut are the solution you are looking for! Couriers transport items between the Warehouse and all of the workplaces.
Step 9: Rest of the Colony
This is where you need to decide what you need next, based on how you play and what your colony needs. But you have several things to look at. Once you get seven citizens you can get attacked by raiders and you may want to build a Guard Tower, or you may get a sick citizen and want to build a Hospital, or you may decide you want a Sawmill to make the needed items for a worker. Or you may just want to have a specific worker, or you found a great place for a certain hut. You decide how your colony will grow!
Detailed Walkthrough
If you’re here, CONGRATULATIONS! You have already installed MineColonies and are ready to embark on an adventure to explore, conquer and establish your own colony. Work hard and turn it into a thriving town. Hone your leadership skills and grow grow grow into a city! Lastly, can you be a grand leader and finally achieve a metropolis? (Check your ingame MineColonies Achievements.)

To avoid mistakes and frustation, read through this entire guide carefully before starting to play.
Placement of the Supply Ship or Supply Camp
To place the Supply Ship, you need to have a large enough body of water (at least 32 x 20). To place the Supply Camp, you need to have a large enough flat, clear piece of land (at least 16×17 blocks).
When you place the Supply Ship/Camp, it will spawn a chest that will contain the Town Hall block and the build tool. Once the Supply Ship/Camp is placed, you can’t place another in the world.
Place the Supply Ship/Camp by right-clicking the item directly on the water/ground – if you have a build tool already, don’t use it for this (you’re expected to get the tool from the camp/ship rather than already having one).
Hint: If you’re not able to place the Supply Camp/Ship, try it block by block: one to the right, left, closer or further from the area you cleared. The area cannot contain any holes or have any flowers, grass, ferns, seaweed, coral etc.
Town Hall
The protected area of your colony (once the Town Hall has been placed) will be a square 4 chunks in radius, measured from the chunk where you placed your Town Hall block the first time (with the default config). Therefore, plan carefully where you want to place your Town Hall. 64 blocks (4 chunks x 4 chunks) in every direction from that chunk will be your protected Town area including mountains, hills, lakes, oceans, caves, world generated structures, etc. from bedrock to sky limit.
Hint: The most important tool you will need for the entire mod is the build tool (check our build tool page). Obtain one from the Supply Ship/Camp or craft another so you can place all the huts (including the Town Hall) in the perfect spot.
Due to the protected area of each colony, you have to carefully scout your surrounding to make sure you are clear of any other colonies nearby preventing you from placing your Town Hall or limiting your colony area in that direction (in multiplayer, etc.). If there is another colony too close to your current position, you won’t be able to place a Town Hall.
Location info of the next closest colony exits in the debug screen (displayed when you press F3). If there is a colony close to your current position, it will also show you the required distance away to place your Town Hall.


For example, in the official MineColonies server it will be the default 4 chunk radius (4 + 4 + 1
Now, after you have explored, thought carefully, planned, and found the perfect spot to start your colony, let’s take a look at the steps to get your colony running!
Setting Up Your Colony
Step 1
Get enough materials and craft your Supply Ship/Camp, then place it by right-clicking a block with it (do not use the build tool, if you happen to already have one). There will be a chest (or rack) inside the placed Ship/Camp with a Town Hall block and a build tool.
Hint: Gather as many materials as possible to give to your Builder when they start building. They will ask you for all kinds of materials for each building or upgrade, depending on the style of building you have chosen. The materials needed for most styles will be mainly wood, cobblestone, and torches for the lower levels. Further upgrades will require more elaborate materials.
Step 2
After you have carefully decided where you want to place your Town Hall (remember, the position where you placed the Town Hall block at first will be the center of your colony’s protected area. Once placed, the area will be set and cannot be changed), use your build tool to place the Town Hall. Once you commit to the placement of the Town Hall (the green checkmark), the Town Hall block will be placed. To officially start a colony, you need to right-click on the block, then select Create New Colony. Once you’ve done this, your initial four citizens will start appearing!
You can now right-click the Town Hall block again to look at its graphical user interface, or GUI for short:
Town Hall GUI
You can use the tabs on the left side to switch between different categories.
Information: This is the overall information section of the Town Hall GUI.

Actions: This is the most important section.

Page 1: Here you will see the name of your colony as well as the building level of the Town Hall. And the buttons:
Page 2: This is only enabled if PVP is turned on in the config file. Here you have:
Permissions: Here you can invite other players to your colony to collaborate.
Permissions Pg. 1 & 2: You can add a player and give them a rank in your colony. Each rank will have certain privileges in the changeable protection system.

Permissions Pg. 3 & 4: Here you can manage the permissions for each rank.

Permissions Pg. 5 & 6: In this section, you can add a certain block’s position that will bypass the protection system for interaction. Any player will be able to interact with that block as long as their rank includes the permission ‘Access Free-Blocks.’

Citizens: This section displays the names and skill levels of the citizens in your colony.

Settings: This section is where you can control how your citizens will be hired and assigned housing in your colony, among other things.

Page 1: There are four buttons here:
Page 2: There are two buttons here:
Work Orders: Here you will see the work orders your Builders have in the order they have been assigned. Builders will not start another order until they have successfully completed the top one.

Happiness: This is the section for the global happiness of your colony so you can see what area needs more attention to raise the happiness level.

Step 3
Before any other building can be built, you must craft the Builder’s Hut block and use your build tool to place it. Once you commit to the placement of the Builder’s Hut (the green checkmark), the block will be placed and a Builder will be automatically assigned (or you can manually assign one with the best traits for a Builder if you changed this in the setting tab in the Town Hall’s GUI). You now officially have a Builder! CONGRATULATIONS! When accessing the Builder’s Hut block by right-clicking on it, you will see a GUI with different options:

By pressing the arrow button in the top right corner of the GUI, you will be taken to page 2 of the GUI where you will find the following:

You will have to click Build Options on the Builder’s Hut, then click Build Building. This will give your new Builder the build assignment so they can build their own hut first. If the Builder’s Hut is not built, the Builder cannot build any other buildings.
The Builder will ask for the materials they need. Right-click on them when they have a red icon above their head to see the materials they currently need.
Hint: If you see that the Builder hasn’t finished a build order and you don’t see them asking for any materials, go to the Builder’s Hut, recall the Builder, and wait a bit to see what they need. Also, check page 2 of the Builder’s Hut GUI and see what resources are in red (those are missing resources).
Step 4
Once the Builder has finished their hut, you’re ready to start building any other building you want! Just craft the desired block and use your build tool to place the building. Once it’s placed, go into the GUI for the new block, click Build Options, and then click Build Building. It’s that simple!
Hint: Consider upgrading the Builder’s Hut to level 2 as soon as you can so the Builder can upgrade other buildings.
Final Notes
You have now completed the most important steps completed to start and create your colony!
Your question now is probably, “What to build next?” The Town Hall, Mine, Forester’s Hut, Farm, Fisher’s Hut, Guard Tower, Courier’s Hut, Bakery, Restaurant, and more are probably good places to start.
But you start with only 4 citizens! Now what? Well, the next step after your 4 citizens are employed and are working hard is to plan and place the House. This will give you additional citizens for each level of a House you build in your colony (after your inital four citizens are housed)! Now, what do you do with so many citizens? You cannot assign more than 1 worker per hut. Therefore, consider building additional huts for more Miners, Foresters, Builders, Farmers, Fishers, and many more!
Hint: Upgrade your huts to the highest level possible (level 5 for all of them except the Tavern) to get achievements (and increase the speed at which the worker levels).
Minecraft Wiki
Из-за новой политики Microsoft в отношении сторонних ресурсов, Minecraft Wiki больше не является официальной. В связи с этим были внесены некоторые изменения, в том числе и обновлён логотип вики-проекта. Подробности на нашем Discord-сервере.
Minecolony/Быстрый старт
Быстрый старт [ ]
I вариант: Для быстрого старта потребуется:
Сначала необходимо сделать ратушу. После появления поселенцев (Settlers) следует разместить дом для них (оптимальное расстояние между домами/ратушей/работами — 20 кубов), чтобы они могли устраиваться на работу. Дальше по желанию установите блок дровосека/фермера/шахтера/строителя (помогут в добыче строительных материалов для строителя и обеспечат деревню едой).
Для строительства домов нужен как минимум 1 строитель. В настройках каждого дома нажмите на build house для постройки дома. При приближении к строителю он скажет какие материалы ему нужны для строительства всех активных построек. Материалы следует помещать в сундук строителя. Строитель может взять ресурсы из других любых сундуков (даже из сундука игрока).
II вариант: Также есть «Cундук первопроходца». Его можно ставить только 1 раз в мире (сохранении).
.png)
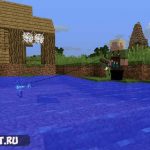
Его можно поставить только в воду. От размера водоема зависит содержимое сундука. Если поставить этот сундук в море, то появится корабль (размер корабля тоже зависит от размера водоема) и сундук с определёнными ресурсами(при условии, что сундук поставлен в большом водоеме).
Welcome to the MineColonies Wiki!
MineColonies is an interactive building mod that allows you to create your own thriving town within Minecraft. It lets your leadership skills soar by providing you with everything you need to build your kingdom. MineColonies gives you the flexibility to create a colony as unique as every player. With so many options, you’ll create a different colony every time, adapt it to any biome, build inside a mountain, on top of one, under the ocean, or in the sky.
The limit is your imagination!
MineColonies features NPC workers such as Builders, Farmers, Fishers, Foresters, Guards, Miners, Smelters, Bakers, Cooks, Couriers, five types of animal herders, Composters, and many more, with even more being developed and added as the mod grows.
It also includes specialized buildings such as the Warehouse, House, Town Hall, Barracks, Library, University, and even the School.
Please note that the wiki is always referring to the latest 1.16.5 alpha version of MineColonies!
Installation
Tutorials
Systems
Items/Blocks
Workers
Buildings
MineColonies is a free and open-source mod developed by Let’s Dev Together (LDT), a non-profit community. The source code is available on GitHub. Our developers are a hard-working, well-integrated coding team, continuously adding more content to make the MineColonies experience even greater. However, we are always looking for more people to contribute to the mod, whether as a coder, builder, artist, voice actor, wiki editor, tester, or simply supporting us on Patreon!
Found a bug? Report it as an issue to help us give you the best gaming experience. If you require any help or just want to join the conversation, check us out on Discord!
MineColonies [1.17.1] [1.16.5] [1.15.2] [1.14.4] [1.12.2] [1.11.2] [1.10.2]

Изображения (кликабельны):

Мод на колонии жителей в стиле MCA.
Основное прохождение
Если вы сделали установку, поздравляем! Вы на пути к созданию собственной процветающей колонии!
Но один из первых вопросов, который вы должны задать себе: «Куда мне поставить свой город?». Когда начинаете новый мир, просто играйте в Minecraft, как обычно. Найдите хороший район, где вы могли бы начать свой замечательный новый город и начать собирать некоторые ресурсы, такие как дерево, грязь, песок, гравий и булыжник.
Подсказка: самый важный инструмент, который вам понадобится для всего мода — это Building Tool (см. Нашу страницу Building Tool). Создайте Инструмент Строительства, чтобы вы могли поместить все здания, рабочие хижины и даже Корабль Снабжения или Лагерь Снабжения в идеальное место.
Строительный инструмент.
Чтобы начать свою колонию, вам нужно сначала создать корабль снабжения или лагерь снабжения (только один из них может быть размещен на игрока в мире). По умолчанию на каждого игрока может быть запущена только одна колония. Поместите блок «Корабль снабжения» / «Лагерь», используя строительный инструмент для наилучшего размещения, или щелкнув правой кнопкой мыши по земле, и сундук появится там, где вы щелкнули по земле. В этом сундуке будет блок Ратуши и Строительный инструмент. Это единственный способ получить блок ратуши, он не может быть обработан.
Совет: Лагерь снабжения нуждается в площади 16 х 12 х 17 для размещения вниз. Совет: Корабль снабжения должен быть помещен в большой водоем, иначе он не будет построен. Это также не может быть река, потому что она слишком мала площадь 17 х 30 х 32 требуется для его размещения.
Ваш первый шаг, чтобы начать свой город, помещает Сундук Ратуши. Хотя его можно разместить вручную, гораздо лучше разместить ратушу, используя инструмент для строительства, полученный из сундука с припасами. Строительный инструмент поможет вам разместить ваши здания, а с его помощью вы увидите трехмерный призрачный контур того, как будет выглядеть здание.
Следующее, что вы должны сделать, это создать «Хижину строителей». Еще раз, используйте Building Tool, чтобы разместить хижину, чтобы вы могли расположить хижину именно так, как вы хотите. Хижина строителей позволит вам нанять строителя, и, как вы можете догадаться, строитель будет строить и улучшать здания. После постройки, модернизация хижины строителя позволит вашему строителю модернизировать другие здания. В опциях конфигурации мода или в папке config вашей игры Minecraft вы можете переключаться, если ваш строитель строит бесплатно (бесконечные ресурсы) или вам нужно доставить ему ресурсы.
В настоящее время есть еще 10 рабочих хижин, которые можно разместить и построить. Это шахтерская хижина, хижина дровосека, рыбацкая хижина, хижина фермера, хижина пекаря, хижина повара / ресторана, хижина гердера, хижина плавильщика, хижина композитора и башня охранника (или казармы). Все эти хижины позволяют работникам собирать ресурсы, если вы дадите им надлежащие инструменты. Дровосеку нужен топор, чтобы он мог начать рубить деревья и получать бревна. Шахтеру понадобится построить первый уровень своего здания, и ему понадобятся лопата, кирка, булыжник, факелы, лестницы, заборы, доски и плиты (все из древесины дуба),
Рыбак сначала должен построить свою хижину, а затем провести рыбалку. Жезл, фермеру нужно построить свою хижину, а также чтобы вы построили участок и разместили Поле (блок Пугало), и Стражам сначала понадобится Башня Стражи, а затем лук и / или меч. В зависимости от типа инструментов, предоставленных работникам, они будут собирать то, что им позволит этот инструмент. Даже используйте зачарованные инструменты!
Майнкрафт мод колония гайд

Многие из вас знакомы с модификациями MineColony и Millenaire. В этой статье рассматривается первая модификация, а именно MineColony.
*Постройка-сундуком называется та постройка, которая управляется из специального блока-сундука (улучшение, управление).
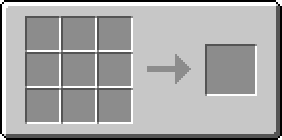
Чтобы началась жизнь в деревне, нужно поставить Town Hall (Ратуша), который создаётся из восьми досок+1 бумага: 
Поставьте его в открытое пространство, так как постройка требует очень много места.
Далее создайте два-три сундука «Citizen Hut» и поставьте их от Ратуши на расстоянии 15-20 метров от него. Если жители появились, то можно начинать строить «Builder hut», который лучше всего ставить поближе к Ратуше, но не очень сильно, иначе при начатии строительства может случится так, что Ратуша и дом строителя сольются и получится «каша». Ах да, создание домов: 

Далее можете делать что хотите и как хотите. Не забывайте собирать налоги с Ратуши и проплачивать ежемесячно заработную плату работникам (строителям/лесорубам/охотникам/шахтёрам).
Создание всех построек-сундуков: 


glossary
@include default.lexicon
base
grgrgrgrgrgrgrgr
grgrgrgr=wgrgrgr
grgr=w=w=w=wgrgr
grgr=w=w=w=wgrgr
grgr=w=w=w=wgrgr
grgr=w=w=w=wgrgr
grgrgrgrgrgrgrgr
grgrgrgrgrgrgrgr
level 5
_C_C_C_C_C_C_C_C
_C=C=C=C=C=C=C_C
_C=Coooooooo=C_C
_C=Coooooooo=C_C
_C=Coooooooo=C_C
_C=Coooooooo=C_C
_C=C=C=C=C=C=C_C
_C_C_C_C_C_C_C_C
200?’200px’:»+(this.scrollHeight+5)+’px’);»>
base
grgrgrgrgrgrgrgr
grgrgrgr=wgrgrgr
grgr=w=w=w=wgrgr
grgr=w=w=w=wgrgr
grgr=w=w=w=wgrgr
grgr=w=w=w=wgrgr
grgrgrgrgrgrgrgr
grgrgrgrgrgrgrgr
level 5
_C_C_C_C_C_C_C_C
_C=C=C=C=C=C=C_C
_C=Coooooooo=C_C
_C=Coooooooo=C_C
_C=Coooooooo=C_C
_C=Coooooooo=C_C
_C=C=C=C=C=C=C_C
_C_C_C_C_C_C_C_C